
I am working on a step-through bicycle frame - a design which is simultaneously common and unusual. It is common if you look around the streets of Boston, which are teeming with vintage step-throughs. And it is unusual considering that no one I know has built this exact style of frame. Mixtes and modified step-throughs yes. But not plain step-throughs where the top and down tubes are parallel. In fact, this bicycle does not even have what can be called a main triangle. It is a main parallelogram.
The head tube and the seat tube are also parallel lines - each at a 72° angle. This double set of parallels makes for an interesting visual pattern.
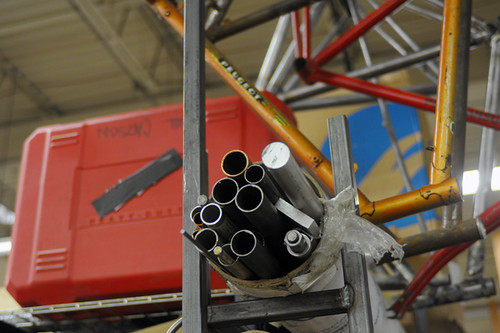
For this frame I used straight gauge tubing, so that I could practice cutting and brazing unsupervised without worrying about butting and thin walls. The hardy tubing should also minimise flex and twist in the step-through design, as well as make it possible to store the finished machine outdoors and generally treat it as a beater bike.
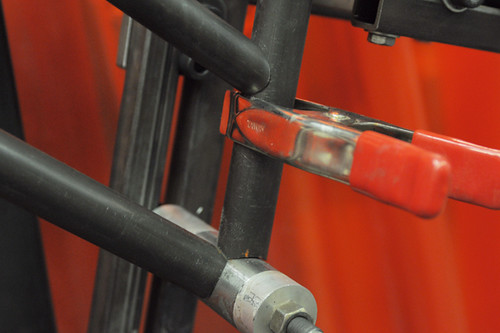
The joints will be fillet brazed (lugless) - partly because I would like to practice fillet brazing, and partly because there isn't currently a reliable source for a step-through lugset. Fillet brazing requires using brass as the filler material and heating up the joints considerably more than you would with lugged silver brazing. Since I am using straight gauge tubing, this should not be a problem. The only thing I am a little nervous about is the bottom bracket. With a lugged bottom bracket, the tubes are inserted into hollow sleeves, allowing you to look inside after brazing and check whether the filler material has pulled through properly. With a plain shell like the one pictured here, this cannot be done. I've considered using a lugged bottom bracket while fillet brazing the rest of the joints, but ultimately decided against that. I'll just have to be especially diligent in this area.

My goal in making this frame was to get some practice with basic technique without having to worry about thin wall tubing, unusually wide tires or multitudes of braze-ons. However, it was also crucial to me that I ride the finished bike as much as possible as part of everyday life, and I knew that would not happen with a plain diamond frame. The resulting compromise was a single speed 26" wheel step-through with a raked-out fork. Basically very similar to the prototypical English "Sports Roadster," but with lower trail.
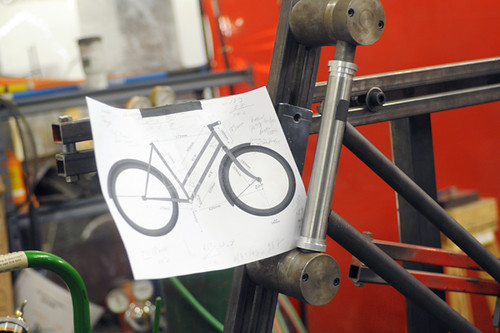
Getting the slanted top tube was in a sense straightforward, but not without its quirks. To start with I specced out the slope to match the angle of the downtube. Funny thing though: When the angles were mathematically identical they looked off to the human eye (several spectators confirmed this), so in fact the tubes had to be not quite parallel in order for them look right. Paul Carson taught me how to use his notching lathe, and none of the notches were problematic except for the top head joint. That one had to be adjusted repeatedly to make the angle look right - but finally it got there.
As the mocked up tubes are starting to look bike-like, those who see the beginnings of this frame tend to have an "Aha, I know what kind of bike this is!" type of reaction. It's been nice to get that feedback. While the first frame I made was done in the privacy of a teacher-student environment, now I am working in a shared shop space with loads of people around. Random people passing through will ask what I am working on, and repeatedly I find myself articulating not just the concept of the frame but the step-by-step process of building it. No doubt this recital helps me make more sense of the process myself.


0 comments:
Post a Comment